Note
This page explains Balladeer's classic syntax, which is no longer maintained.
Refer to a more recent article for its replacement, Balladeer lite.
Web native
Balladeer is designed with the Web in mind. Straight out of the box, it can render your dialogue into HTML5 pages. The only thing left to do is to integrate your Story into a Python web framework.
For beginners, that might present something of a challenge, so I've included a free sample. This article explains example 5 from the Balladeer repository, which contains a complete implementation of 10 Green Bottles, parser-style, as a web service.
I've kept it simple and easy to understand. Here's how server.py is organised:
| Functionality | Lines of code |
|---|---|
| Drama object | 40 |
| Web routes and views | 60 |
| Program CLI | 30 |
The Drama code is exactly the same as we saw in the previous article. The command line boilerplate is typical of any Python program, so we won't dwell on that today.
That leaves about 60 lines of web code to explain. When we're done, you'll understand fully how your Story is delivered to the world.
Framework
Python has many good web frameworks. This example uses aiohttp, which is lightweight and asynchronous. I can also recommend bottle, equally lightweight, but a synchronous system.
Endpoints
There are four endpoints to our web service:
1. Root endpoint
The landing page. It creates a new Story, then redirects to the next, which is...
2. Session endpoint
GET requests to a URL on this endpoint return the next page of the Story.
3. Command endpoint
POST requests to a URL on this endpoint submit a command to the Story.
4. CSS endpoint
HTML5 is styled by CSS3 files which themselves are served over the web. Similarly, you'd need endpoints for images, audio files, and custom fonts should you wish to use them.
Code
1. Root view
This code starts off exactly as did our previous command-line program. We create the Drama with its folders. Then from that the Story.
What's new is that we ourselves send a look command and create a presenter to animate the result.
We keep the Story in an app object which the web framework provides for such a purpose. Story objects have a unique ID, and this is used in subsequent URLs to identify and retrieve them.
async def get_root(request):
    drama = Bottles()
    drama.folder = ["song.rst", "end.rst"]
    story = Story(context=drama)
    text = story.context.deliver("look", presenter=None)
    story.presenter = story.represent(text)
    request.app["sessions"][story.id] = story
    raise web.HTTPFound("/{0.id.hex}".format(story))
2. Session view
The first job of the session view is to retrieve the Story object via its unique ID.
async def get_session(request):
    uid = uuid.UUID(hex=request.match_info["session"])
    story = request.app["sessions"][uid]
Then we animate a frame. The following code chooses the next dialogue shot, animating it with the timing specified in the dialogue file:
animation = next(
        filter(
            None,
            (
                story.presenter.animate(
                    frame, dwell=story.presenter.dwell, pause=story.presenter.pause
                )
                for frame in story.presenter.frames
            ),
        )
    )
Some web-specific stuff here. We decide a title for the page and prepare the web user interface. A Story object can choose to supply extra user controls. Our Story doesn't do that, so by default Balladeer gives us a single text box for command input.
title = story.presenter.metadata.get("project")[0]
controls = [
    "\n".join(story.render_action_form(action, autofocus=not n))
    for n, action in enumerate(story.actions)
    if story.context.count
]
We have seen story.render_frame_to_terminal in previous examples. Since this is a web service we use story.render_animated_frame_to_html to generate the dialogue in HTML.
The web page has a couple of optional elements too:
- Links to the CSS files we're using.
- Story-specific settings which will be rendered as CSS variables for use by our style sheets.
rv = story.render_body_html(title=title).format(
    "<!-- Extra head links go here -->",
    story.render_dict_to_css(vars(story.settings)),
    story.render_animated_frame_to_html(animation, controls),
)

return web.Response(text=rv, content_type="text/html")
These three elements are combined to create an HTML page.
3. Command input
When a user enters a command, the browser sends it to our cmd endpoint.
We retrieve the Story object as we did before. Then most of the code is validation and error checking.
async def post_command(request):
    uid = uuid.UUID(hex=request.match_info["session"])
    story = request.app["sessions"][uid]
    data = await request.post()
    cmd = data["cmd"]
    if cmd and not story.context.validator.match(cmd):
        raise web.HTTPUnauthorized(reason="User sent invalid command.")
    else:
        text = story.context.deliver(cmd, presenter=story.presenter)
        story.presenter = story.represent(
            text, facts=story.context.facts, previous=story.presenter
        )
    raise web.HTTPFound("/{0.hex}".format(uid))
The two lines invoking the Story work the same as we've seen in previous examples. Every time we create a new presenter, we need to store it on the Story object so it's available in the session view.
4. CSS styling
A powerful feature of Balladeer is the way it integrates its rendering of dialogue with web-standard CSS. You can even modify styled properties from within dialogue files, changing colours according to the scene.
That means you can design the layout and appearance of your web Story entirely within CSS3. There will be articles on how to do that in the future.
For now, all we want is some simple styling to suit a demo. One of Balladeer's upstream packages has such a file, so we can borrow that for now. It will have been installed along with the library. We just have to tell the web framework where to find it:
app.router.add_static(
    "/css/base/", pkg_resources.resource_filename("turberfield.catchphrase", "css")
)
Running the example
In case you haven't installed Balladeer yet, I'll run through the steps again.
Virtual Environment
First make a fresh Python virtual environment:
python3 -m venv ~/balladeer-app
Packages
Update the package manager within it:
~/balladeer-app/bin/pip install -U pip wheel
Install (or update) Balladeer and the web framework:
~/balladeer-app/bin/pip install -U aiohttp balladeer
Download
- Download the repository as a zip file.
- Unzip it to a local directory.
Operation
cd to the directory under examples:
cd examples/05_server_parser
Run the example like this:
~/balladeer-app/bin/python server.py

======== Running on http://127.0.0.1:8080 ========
(Press CTRL+C to quit)
Play the demo by pasting http://127.0.0.1:8080 into the browser.
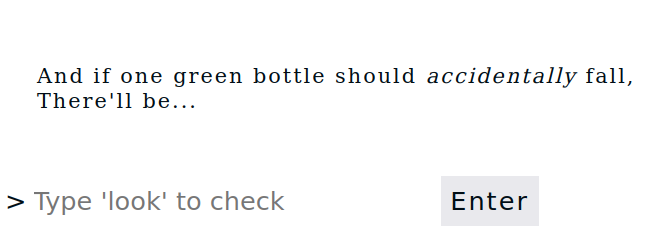
Result
It's not pretty, but it works! The same Story we tested last time in the terminal is now served over the web.